I want to install Linux on the device.
It’s EOL so it seems I can’t use RW_LEGACY (that column is also empty for parrot on mrchromebox’s page), so I went the UEFI Full ROM route.
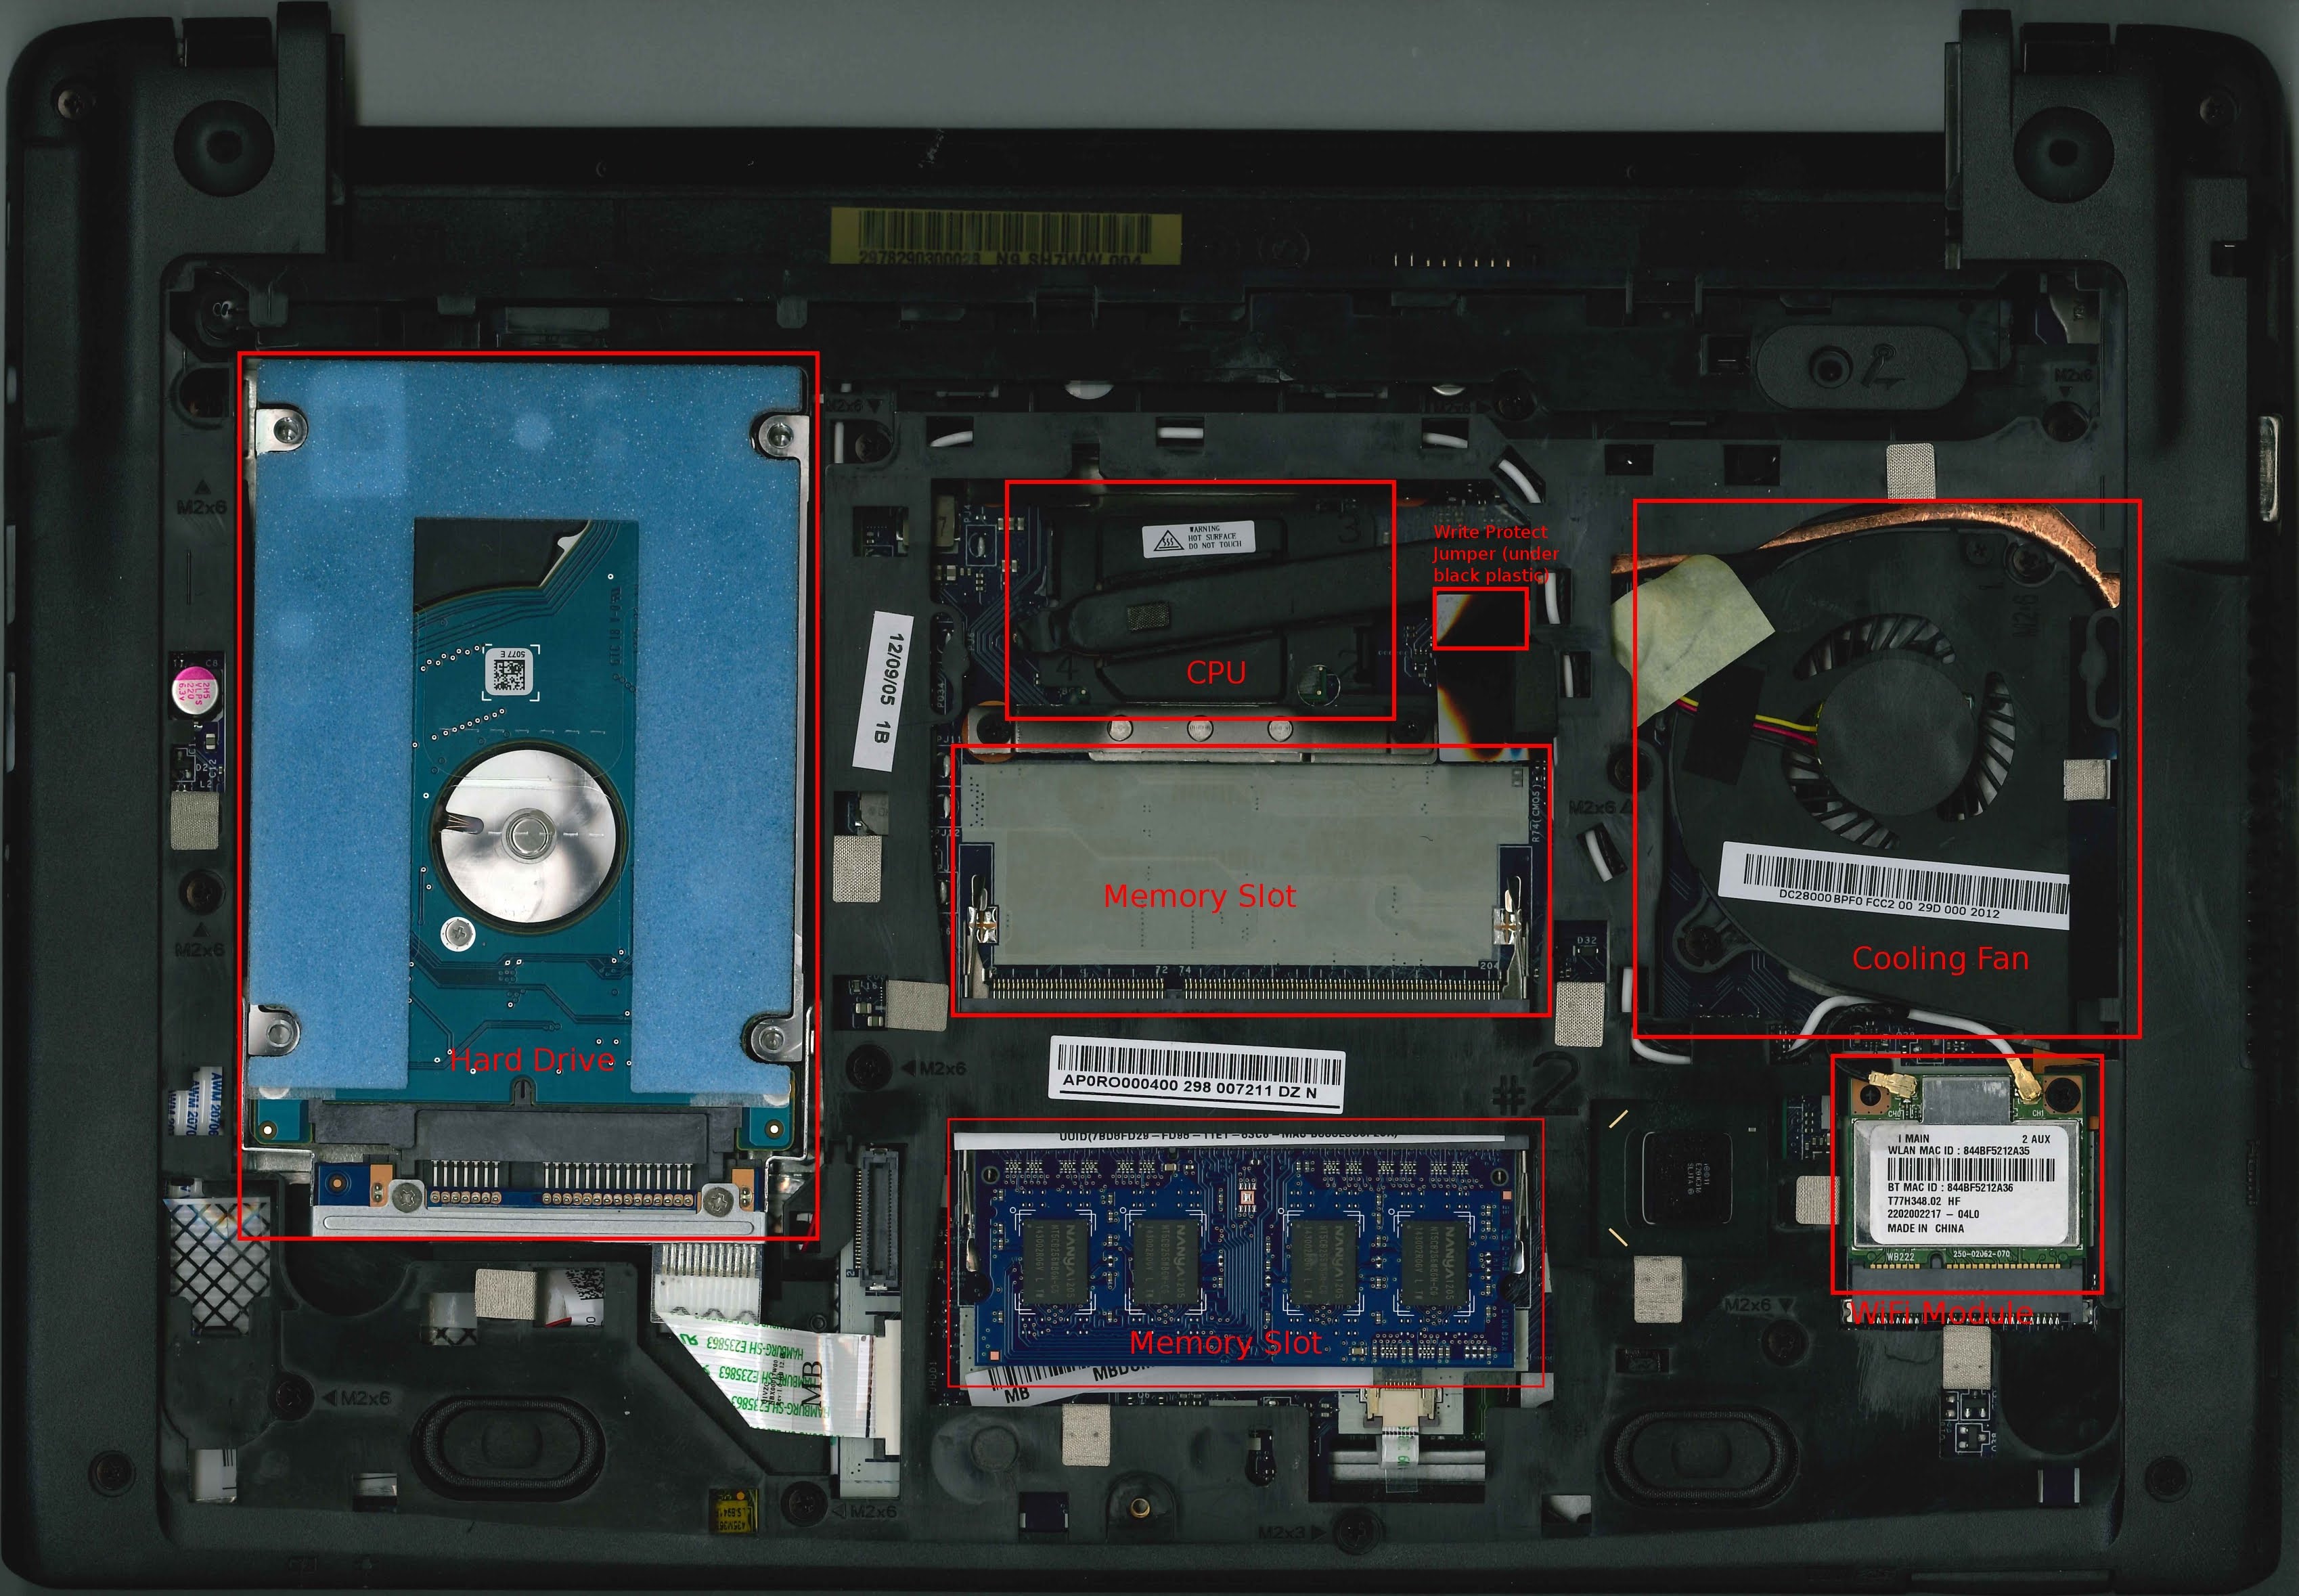
In order to disable the write protect I tried using a jumper to short the terminal pair under the black tape shown here:
Unfortunately It didn’t work, so I tried updating, re-entering developer mode, downgrading, but nothing worked still.
Then I tried shorting the terminals many different ways.
I put aluminum foil between them, wrapped them in wire, soldered them together, etc.
It came to a point where I removed the connector and soldered straight to the pads on the board.
Even that didn’t work.
I tried searching around and couldn’t find anything similar to this.
Most of that was a few months ago.
I tried a bit more today and unfortunately it’s still the same.
So I’m stuck.
Any help is appreciated.
I have access to and experience with microcontrollers so it’s ok if any solutions involve taking off the bios flash and programming it externally, I would just need some directions.
Bridging the jumper with alluminum foil worked for me so I wonder why your jumper seems to be faulty.
Anyway, this suggestion should work but it might be really inconvenient because iirc the firmware chip on PARROT is on the keyboard side of the motherboard so you need to at least partially disassemble the laptop to get at it.
Sorry for taking this long to write back, the past few weeks have been so busy I pretty much didn’t have any time to think at all. Tried getting back to this last weekend and started writing but got stuck in some research / testing so I couldn’t send it in time.
Thank you both for responding. I had some longish answers with questions for both of you and then today, as I was finishing editing them, I seem to have found the solution to the problem.
(this honestly depresses me a bit because it’s exactly what I was starting to figure out I’d do and if I had found it 10 months ago I would have a useful, working laptop all this time)
As I unfortunately don’t have a CH341A, I figured I could just attach an Arduino or ESP32 as an intermediary and write to the chip via SPI.
Thinking about it for a bit, I thought since I was gonna solder stuff anyway, it might be easier to just solder the WP high or low directly and run the script again. Either way I’d have to know the chip’s pinout and where it was (which I didn’t).
So I just opened the laptop up again (it’s not too difficult to access the keyboard side, just a few screws and ffc cables) and tried finding it, but the text on basically every chip was very hard to read (there are also quite a few flash-looking chips) so I only had suspitions.
So I found a boardview* that seems to generally correspond to the device, and started figuring it out through the RTC battery and jumper connector, but realized it would take me a bit more to figure out.
* Also found this schematic which I didn’t find very useful.
At this point I thought I was done for the day and almost sent the messages here as they were. Through some sort of divine inspiration I decided to search the same thing I searched many times last year and found this reddit post on the GalliumOS subreddit which points to this imgur album (this baffles me. i would have never thought of imgur).
The imgur guy is in my exact situation and shows exactly which chip it is and which pins to connect on the chip so the WP is disabled.
This is it, for reference:
I’m gonna do that and see if it works. Posting already so I don’t take any longer on this.
It worked! Gave up on installing Linux for today but will soon.
Two things I noticed:
The RTC battery is dead (could have something to do with the jumper not working?)
My function keys don’t seem to work on Linux (tried live images of recent NixOS at kernel 6.15 and Ubuntu 24.04), don’t know if that’s how it’s supposed to go.